
Connect Google Ads to Corvidae
What does connecting to Google Ads do?
Automated performance
A Google Ads account connected to Corvidae with the correct permissions will have new Conversion Actions created within it for each model in your Corvidae account. Those conversion actions are updated every day with AI enhanced attribution data and can be used as Campaign objectives in Google Ads to automatically improve performance.
These Conversion Actions can also be used to set up A/B tests within Google Ads to prove out performance improvement.
Campaign data enrichment
Connecting Google Ads to your Corvidae account allows us to collect Media Spend, Budget, Budget Cadence, and a number of useful pieces of metadata at Campaign, Ad Set, and Ad levels. When blended with AI-powered attribution modelling this allows us to calculate ROAS, CPA, and facilitates performance modelling. To see the Google Ads Connection in action connect it now or speak to our Growth Team for a demo.
Automated tracking
Corvidae uses the Google Ads API in conjunction with the Auto Tagging setting in Google Ads to track your Campaigns automatically.
How to connect your Google Ads account to Corvidae
Connecting your Google Ads account is the first of two steps of importing rich, contextual AdTech data into your Corvidae attribution suite. To do so follow these instructions:
Visit the Connections page in your Corvidae account
Under “Available Connections” find Google Ads and click “Connect”
Authorise your Google Ads account using an admin login. If you do not have Admin access to your Google Ads account, please visit the User Management page and invite a Google Ads account admin.
Select all of the Google Ads accounts which direct traffic to any of your tracked Properties and click “Add Accounts”.
The final step will differ depending on whether you have Auto Tagging enabled in your Google Ads account. See below for details.
Repeat these steps as necessary for all Google Ads accounts which direct traffic to your tracked Properties.
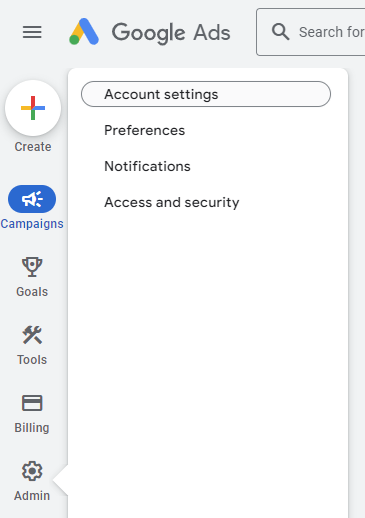
How to check whether Auto Tagging is enabled
To determine if you have Auto Tagging enabled visit:
Google Ads > Admin > Account Settings > Auto Tagging

With Auto Tagging
If your Google Ads accounts have Auto Tagging enabled (which most do) then you’re done. Corvidae will update your Google Ads Campaigns every day in your Corvidae account, blended with AI remodelled journeys and attribution.
Without Auto Tagging
If Auto Tagging is disabled in your Google Ads Account you will need to add tracking parameters to all of your ads to see them in your Corvidae account. There are several ways to do this including hard-coding the parameters into each link you create, using custom parameters, adding a URL suffixes, or tracking templates.
Fortunately, Google Ads makes this very easy. You can set up Corvidae tracking at the account level by navigating to Google Ads > Admin > Account Settings > Tracking and pasting one of the following strings in the Final URL Suffix box.
If the Final URL Suffix box is empty, paste this:
qc_adtech=google&qc_adtech_cid={campaignid}
And if the Final URL Suffix box is not empty, paste this at the end of the existing string:
&qc_adtech=google&qc_adtech_cid={campaignid}
If you are already using Final URL Suffix at Campaign, Ad Set, Ad, or Keyword level, then the Corvidae tracking parameters will also need to be implemented at that level. If you are unsure, please contact your paid marketing team or your Corvidae Customer Success Manager.
If you are using any other method of managing tracking parameters within Google Ads, here are the parameters that Corvidae requires.
Parameter name | Value |
|---|---|
CODE
|
CODE
|
CODE
|
CODE
|
Every new Ad created must include these 2 parameters in order to be correctly joined to Corvidae attribution data.